


![ELF 1 [主控:i.MX6ULL]](/storage/20230915/6504156616031.png)


搜索

elf@ubuntu:~/work$ unzip qtsrc512-master.zipelf@ubuntu:~/work$ chmod 777 -R qtsrc512-master(设置最大权限,避免编译时权限问题)elf@ubuntu:~/work$ cd qtsrc512-master/
由于ELF 1开发板是 ARM 架构,所以需要修改 qmake.conf 文件以适应交叉编译环境。编辑文件路径为 qtbase/mkspecs/linux-arm-gnueabi-g++/qmake.conf,并进行如下修改。
elf@ubuntu:~/work/qtsrc512-master$ vi qtbase/mkspecs/linux-arm-gnueabi-g++/qmake.conf内容如下:
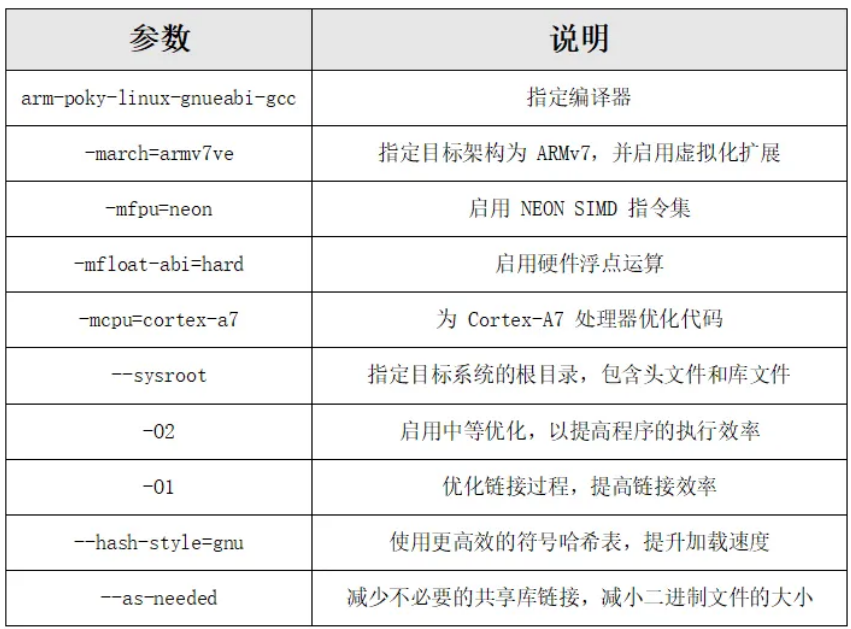
## qmake configuration for building with arm-linux-gnueabi-g++#MAKEFILE_GENERATOR = UNIXCONFIG += incrementalQMAKE_INCREMENTAL_STYLE = sublibinclude(../common/linux.conf)include(../common/gcc-base-unix.conf)include(../common/g++-unix.conf)# modifications to g++.confQMAKE_CC = arm-poky-linux-gnueabi-gcc -march=armv7ve -mfpu=neon -mfloat-abi=hard -mcpu=cortex-a7 --sysroot=/opt/fsl-imx-x11/4.1.15-2.0.0/sysroots/cortexa7hf-neon-poky-linux-gnueabiQMAKE_CXX = arm-poky-linux-gnueabi-g++ -march=armv7ve -mfpu=neon -mfloat-abi=hard -mcpu=cortex-a7 --sysroot=/opt/fsl-imx-x11/4.1.15-2.0.0/sysroots/cortexa7hf-neon-poky-linux-gnueabiQMAKE_LINK = arm-poky-linux-gnueabi-g++ -march=armv7ve -mfpu=neon -mfloat-abi=hard -mcpu=cortex-a7 --sysroot=/opt/fsl-imx-x11/4.1.15-2.0.0/sysroots/cortexa7hf-neon-poky-linux-gnueabiQMAKE_LINK_SHLIB = arm-poky-linux-gnueabi-g++ -march=armv7ve -mfpu=neon -mfloat-abi=hard -mcpu=cortex-a7 --sysroot=/opt/fsl-imx-x11/4.1.15-2.0.0/sysroots/cortexa7hf-neon-poky-linux-gnueabiQMAKE_CFLAGS = -O2 -march=armv7-a -mtune=cortex-a7 -mfpu=neon -mfloat-abi=hardQMAKE_CXXFLAGS = -O2 -march=armv7-a -mtune=cortex-a7 -mfpu=neon -mfloat-abi=hardQMAKE_LDFLAGS = -Wl,-O1 -Wl,--hash-style=gnu -Wl,--as-needed -Wl,-z,relro,-z,now# modifications to linux.confQMAKE_AR = arm-poky-linux-gnueabi-ar cqsQMAKE_OBJCOPY = arm-poky-linux-gnueabi-objcopyQMAKE_NM = arm-poky-linux-gnueabi-nm -Pload(qt_config)

elf@ubuntu:~/work/qtsrc512-master$ touch shell.shelf@ubuntu:~/work/qtsrc512-master$ chmod 777 shell.sh
./configure -prefix /home/elf/work/qtsrc512-master/__install \-opensource \-confirm-license \-release \-shared \-xplatform linux-arm-gnueabi-g++ \-optimized-qmake \-c++std c++11 \--rpath=no \-pch \-skip qt3d \-skip qtactiveqt \-skip qtandroidextras \-skip qtcanvas3d \-skip qtconnectivity \-skip qtdatavis3d \-skip qtdoc \-skip qtgamepad \-skip qtlocation \-skip qtmacextras \-skip qtnetworkauth \-skip qtpurchasing \-skip qtremoteobjects \-skip qtscript \-skip qtscxml \-skip qtsensors \-skip qtspeech \-skip qtsvg \-skip qttools \-skip qttranslations \-skip qtwayland \-skip qtwebengine \-skip qtwebview \-skip qtwinextras \-skip qtxmlpatterns \-make libs \-make examples \-nomake tools -nomake tests \-gui \-widgets \-dbus-runtime \--glib=no \--iconv=no \--pcre=qt \--zlib=qt \-no-openssl \--xcb=qt \--freetype=qt \--harfbuzz=qt \-no-opengl \--libpng=qt \--libjpeg=qt \--sqlite=qt \-plugin-sql-sqlite \-recheck-all \-no-strip
elf@ubuntu:~/work/qtsrc512-master$ . /opt/fsl-imx-x11/4.1.15-2.0.0/environment-setup-cortexa7hf-neon-poky-linux-gnueabi运行脚本并进行编译。
elf@ubuntu:~/work/qtsrc512-master$ ./shell.sh+ cd qtbase+ /home/elf/work/qtsrc512-master/qtbase/configure -top-level -prefix /home/elf/work/qtsrc512-master/__install -opensource -confirm-license -release -strip -shared -xplatform linux-arm-gnueabi-g++ -optimized-qmake -c++std c++11 --rpath=no -pch -skip qt3d -skip qtactiveqt -skip qtandroidextras -skip qtcanvas3d -skip qtconnectivity -skip qtdatavis3d -skip qtdoc -skip qtgamepad -skip qtlocation -skip qtmacextras -skip qtnetworkauth -skip qtpurchasing -skip qtremoteobjects -skip qtscript -skip qtscxml -skip qtsensors -skip qtspeech -skip qtsvg -skip qttools -skip qttranslations -skip qtwayland -skip qtwebengine -skip qtwebview -skip qtwinextras -skip qtxmlpatterns -make libs -make examples -nomake tools -nomake tests -gui -widgets -dbus-runtime --glib=no --iconv=no --pcre=qt --zlib=qt -no-openssl --xcb=qt --freetype=qt --harfbuzz=qt -no-opengl --libpng=qt --libjpeg=qt --sqlite=qt -plugin-sql-sqlite -recheck-allPlease make sure to unset the QMAKESPEC, XQMAKESPEC, QMAKEPATH,and QMAKEFEATURES environment variables prior to building Qt.
elf@ubuntu:~/work/qtsrc512-master$ unset QMAKESPEC XQMAKESPEC QMAKEPATH QMAKEFEATURESelf@ubuntu:~/work/qtsrc512-master$ ./shell.shelf@ubuntu:~/work/qtsrc512-master$ makeelf@ubuntu:~/work/qtsrc512-master$ make install
编译完成后,__install 文件夹包含了 Qt 5.12 所需的所有文件。
elf@ubuntu:~/work/qtsrc512-master$ cd __install/elf@ubuntu:~/work/qtsrc512-master/__install$ lsbin doc examples include lib mkspecs plugins qml
其中,lib文件夹为所需的lib库,examples文件夹为demo工程。
elf@ubuntu:~/work/qtsrc512-master/__install$ tar -cjvf qt5.12.tar.bz2 *将打包后的文件放到U盘,拷贝至开发板并解压。
root@ELF1:~# tar -mxvf qt5.12.tar.bz2 -C /在开发板上设置环境变量,确保 Qt 正常运行。其中export QT_ROOT=/ 为qt5.12文件相关的路径(填解压的路径)。
export QT_ROOT=/export QT_QPA_FONTDIR=/usr/share/fontsexport QT_QPA_PLATFORM_PLUGIN_PATH=$QT_ROOT/pluginsexport QT_PLUGIN_PATH=$QT_ROOT/pluginsexport LD_LIBRARY_PATH=$QT_ROOT/lib:$QT_ROOT/plugins/platformsexport QML2_IMPORT_PATH=$QT_ROOT/qml//两种显示框架根据需求进行设置export QT_QPA_PLATFORM=linuxfb:tty=/dev/fb0 //采用Linuxfb显示框架export QT_QPA_PLATFORM=xcb:tty=/dev/fb0 //采用x11显示框架
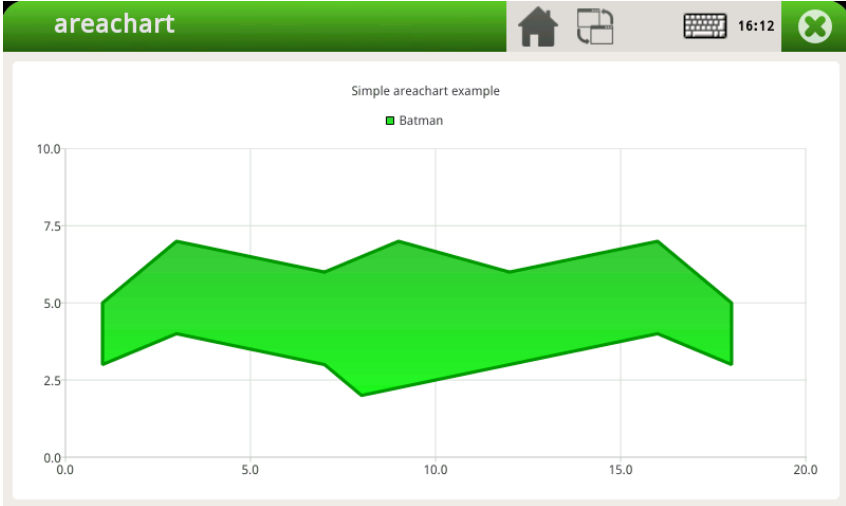
root@ELF1:~# /examples/charts/areachart/areachart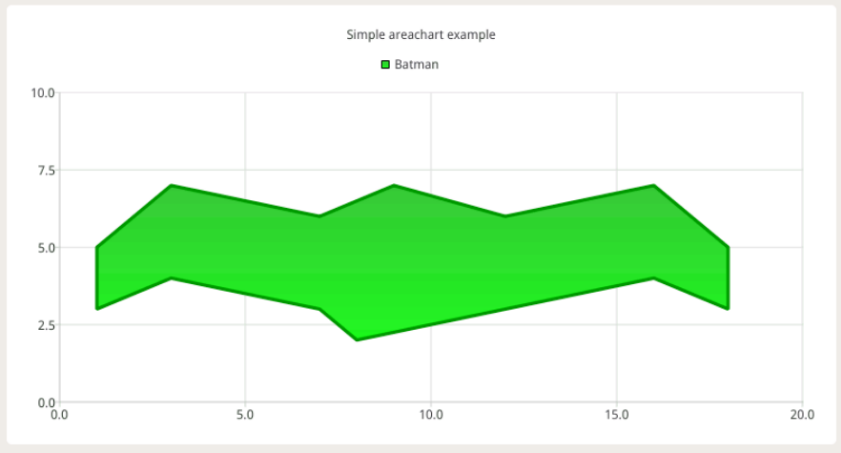
root@ELF1:~# export DISPLAY=:0.0root@ELF1:~# /examples/charts/areachart/areachart
效果如下:
经过上述一系列步骤就可以顺利地将Qt 5.12版本交叉编译并成功移植至ELF 1开发板。衷心希望本文能为屏幕前的小伙伴在嵌入式开发领域的Qt移植工作带来实质性的帮助与指导!

![ELF 2 [主控:RK3588]](/storage/20241127/6746808ef36ed.png)
![ELF2_Lite [主控:RK3576]](/storage/20260105/695b71ecdd6ef.png)
![ELF-RV1126B [主控:RV1126B]](/storage/20260105/695b8a5bd7193.png)
![ELF-RK3506 [主控:RK3506B]](/storage/20260105/695b9a72f304d.png)
![ELF 1S [主控:i.MX6ULL]](/storage/20230915/650415d4d8d83.png)